Tag Display
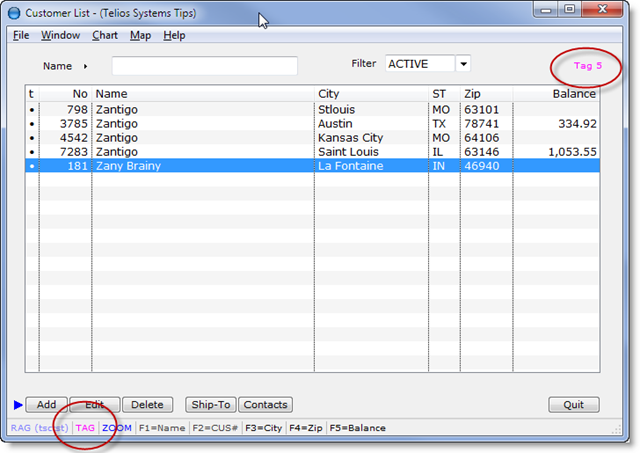
To display the tagged records, press the \ key (the back-slash key above the ENTER key):
The tagged record count will display at the upper right hand corner of the window. The initial display limits to a maximum of 100 records. If you have more than 100 records tagged, scroll up and down to display the rest. The TAG label on the status bar will turn red.
Press the \ character to return to the main list.
The T action is a toggle. If the highlighted record is tagged, press T to un-tag.
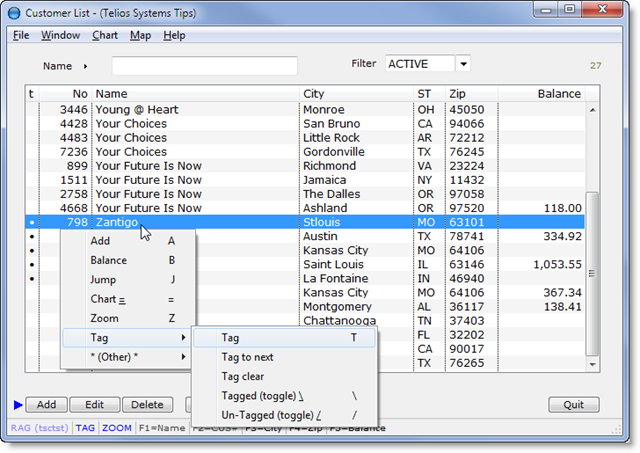
Other TAG actions are available from the popup menu (press M or right-click to display the menu).
- Tag – T action to TAG or un-tag the highlighted record.
- Tag to next – This will TAG all the records from the current highlighted line up to the next tagged record (or to the end of the list).
- Tag clear – This will un-tag all records and remove the TAG column from the list.
- Tagged (toggle) – \ action to toggle the display between tagged and all.
- Un-Tagged (toggle) – / action to toggle the display between un-tagged and all.
Tagged records are filtered by the current index. In our example, the current index is Customer Name.
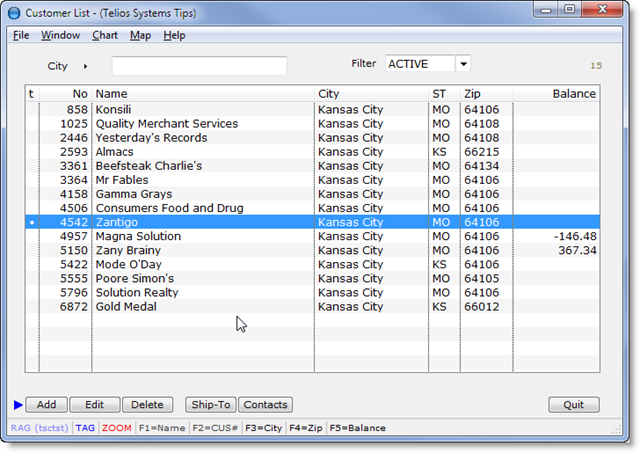
If we set the highlight on Customer #4542 which is in Kansas City and then press F3, the customers will be displayed in City order. If we then press Z to Zoom in on the city of the highlighted line (Kansas City), the list will display only those customers in Kansas City:
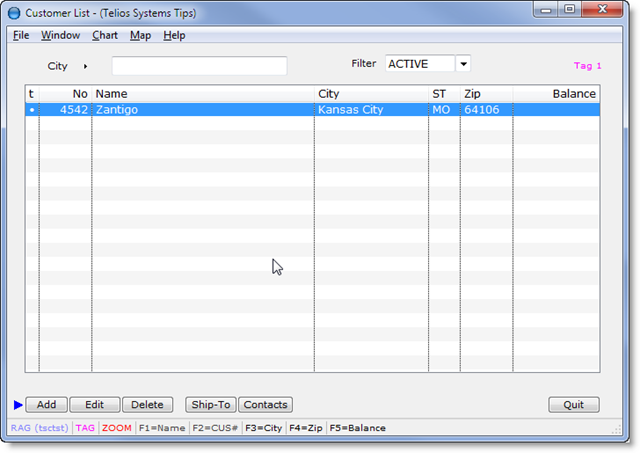
There is only one tagged Customer for Kansas City. So, when you press \, there will only be one Customer for the tagged list:
Of course, you could press Z (Zoom) on the tagged list to take off the Zoom filter. That would display all the tagged records in City order.
 Page 1 — tag
 Page 2 — how tag works
 Page 3 — tag display
 Page 4 — un-tagged display
Next – un-Tagged Display >


