Edit Field
There are several options available depending on the type of edit field.
BASIC:
On many of the captions, there will be a help tag that describes something about the field. Move the mouse over the caption to display the help tag:
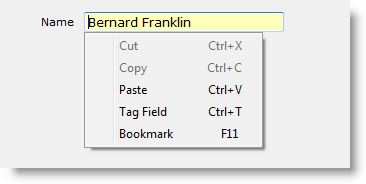
On the basic field, you can right-click the mouse to bring up a pop-up menu of options:
In addition to the normal Cut, Copy, and Paste:
- Tag Field: (CTRL-T). When you tag a field, that field will become the first record highlighted for each record. When tag field is on the status bar at the bottom of the window will display TAG in red. (See Field Tag).
- Bookmark: The F11 key is reserved for bookmarks. (See Bookmarks)
Numeric Fields:
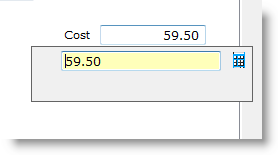
On a numeric or financial field, you can press the letter C to open a calculator. The value currently in the numeric field will display in the calculator.
The operators that can be used are:
- + – Add (plus sign)
- – – Minus (minus sign)
- * or X – Multiply
- / – Divide
The steps of the math will display below the field. The Icon will open the Windows calculator. Press ESC to abort or ENTER to push your result back into the numeric field. (See the article on the Calculator)
POP-UPS:
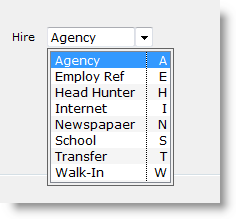
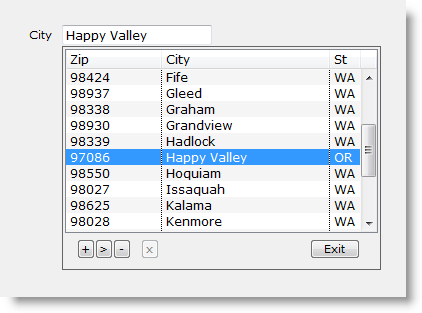
Some edit fields access another table for their values. In this case, there are two types of display:
To access the popup, click on the ![]() box or press CTRL-W or right-click. You can also type the value into the edit field. The program will auto-complete from the options in the table.
box or press CTRL-W or right-click. You can also type the value into the edit field. The program will auto-complete from the options in the table.
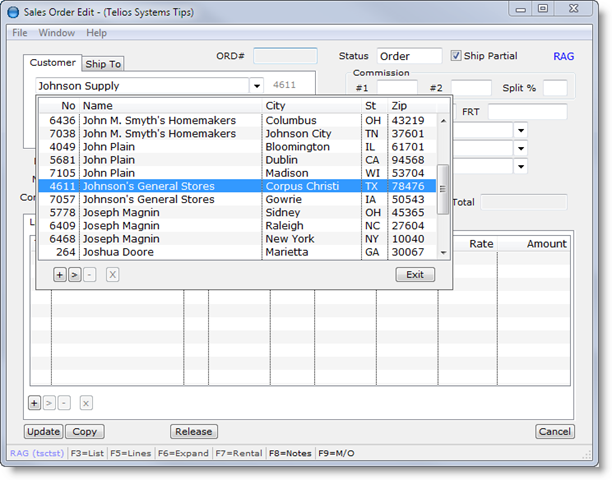
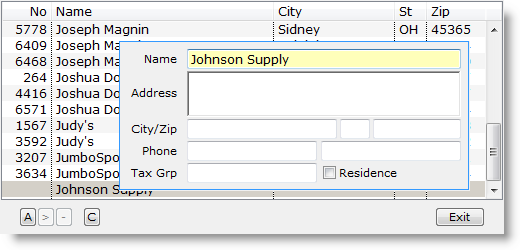
There are popups that allow records to be added and edited. In the Sales Order program you can add a new customer or edit an address:
In this case, we are adding a new customer: Johnson Supply.
The buttons at the bottom of the pop-up are Add (+) and Edit (>). Press the ![]() button or press A to add the customer. The fields will display with the name filled out:
button or press A to add the customer. The fields will display with the name filled out:
The button captions change to A to complete the Add, and C for Cancel.
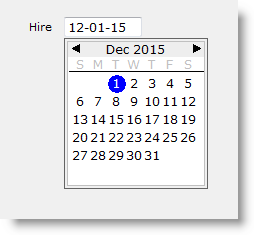
The other display type has a black triangle in the upper right hand corner of the field. Date fields often use the triangle method:
The triangle acts exactly like the ![]() button. When you hover the mouse over the triangle, the cursor will change to a finger pointer and you can click on it (or CTRL-W or right-click).
button. When you hover the mouse over the triangle, the cursor will change to a finger pointer and you can click on it (or CTRL-W or right-click).
Like the Customer example, this example has buttons for Add, Edit and Delete. When a popup has these buttons, the permissions are set in the user profiles.
Multiple Line Edit Fields
Some edit fields have text that covers more than one line. The Notes field is one example.
In this example there are two note fields, one that is used to print on a document, the other for internal or private use. These fields are virtually endless and can contain many paragraphs.
To exit a multiple line field, enter one or two blank lines at the end of your note with the ENTER key. The program will go to the next field. Blank lines at the end of the note will be stripped from the note.
When the field comes into focus (turns yellow), if you don’t type anything and the cursor is at the first part of the field, ENTER will go to the next field. So, if you need to enter a blank line at the very beginning of a multiple line field to push the existing text down, you have to type something first, then press the ENTER key.
The two dashes between the fields is a separator that you can drag up or down to give you more real estate to write with:
The dashes will park at the top or the bottom.
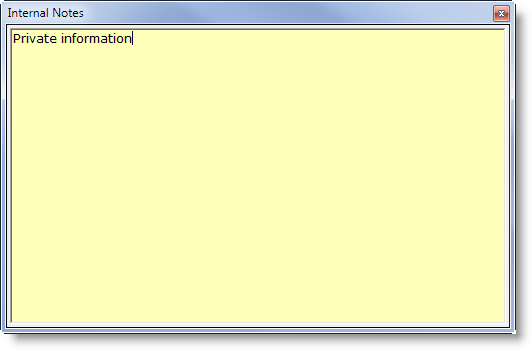
In addition, on most of these fields, you can press CTRL-W to open up a large version of the field:
Press ESC or CTRL-W to close the big window. You text will be display in the regular edit field.
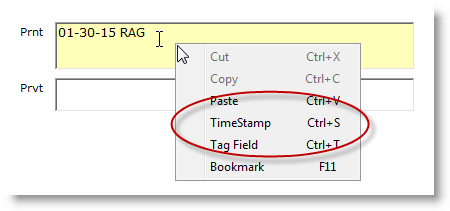
Multiple line edit fields also have a Time Stamp option: press CTRL-S. The current date and the user ID will be inserted at the current cursor position. The options are contained in the context menu (right-click):
 Page 1 — edit window
 Page 2 — the buttons
 Page 3 — find field
 Page 4 — field TAG
 Page 5 — the edit field


