Tool Bar options
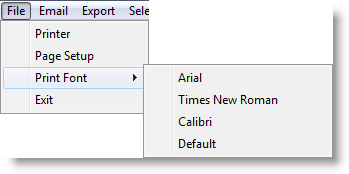
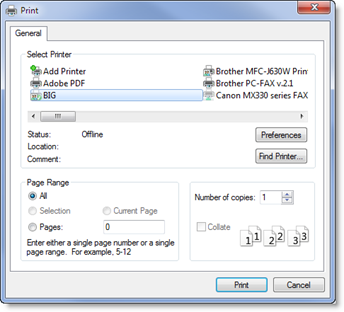
- Printer – This option opens the printer dialog with all the printers available on your PC. Use this for page selection or copies or to select a non-standard printer – not in the local database.
- Page Setup – This option can be used to set up a new logical printer. The Page Setup dialog will open (see above). Once done, the Print dialog (above) will open. When you’re done, the new logical setup will be added to the local database. (On the printer edit field you can change the resulting name).
- Font – The default font for printing is Arial, for preview it is Times New Roman. You can set the print font here
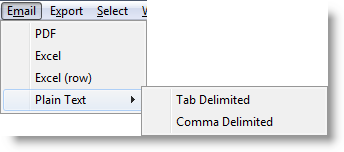
On most reports there is the option to export and Email the report. There are five formats available:
- PDF – Adobe PDF©
- Excel – Microsoft Excel©. This is the XML format supported by Excel versions after 2003, or Open Office. The form of this output looks the same as the print. Each value on the report will be in a cell.
- Excel (row) – Microsoft Excel©. The row format repeats values for every cell on every row. This makes it possible to sort the data by any column.
Note: For the Excel exports, the report heading is produced only at the top of the spreadsheet. Page break and continue information is skipped. - Plain Text: Tab Delimited – Text file with column data separated by the TAB character.
- Plain Text: Comma Delimited – Text file with column data separated by a comma. The column data is encased in quotation marks.
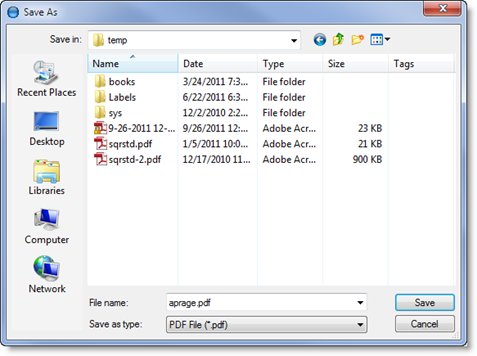
All of the export options will prompt for a file name:
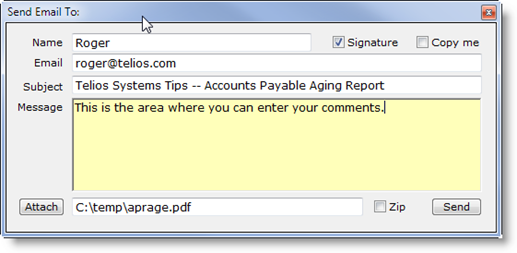
The default file name is the name of the program. Each report will remember the directory that you last used for the file destination. When the report is finished, the Email dialog will open:
- Subject – This field will be filled with your company name and the name of the report. The message area can be filled with cut and paste or typed in.
- Signature – if checked include signature data.
- Copy me – if checked, a blind copy (BCC) will be sent to your Email account.
- Attach – the current output file is listed in the field to the right. You can add more attachments, separated by a semi-colon.
- Zip – if checked, the attached file will be compressed using the .gz format.
- Send – press to send the Email.
The Signature and Copy me checkbox defaults from the email account setting from the Email Account Preference on the Telios Menu program.
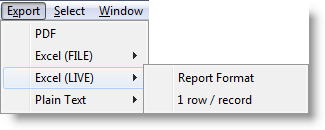
The export options are the same as those for Email with an addition: Excel (LIVE).
If Excel is installed on your PC, it will be opened and populated immediately. The two formats are the same as those for Excel (FILE) output. Note that the Excel (FILE) output is much faster than Excel (LIVE).
 Page 1 — printer selection
 Page 2 — the local printers
 Page 3 — tool bar options
 Page 4 — select
 Page 5 — preview window
Next – Select >
